Raise the Flag { Straw Tags }
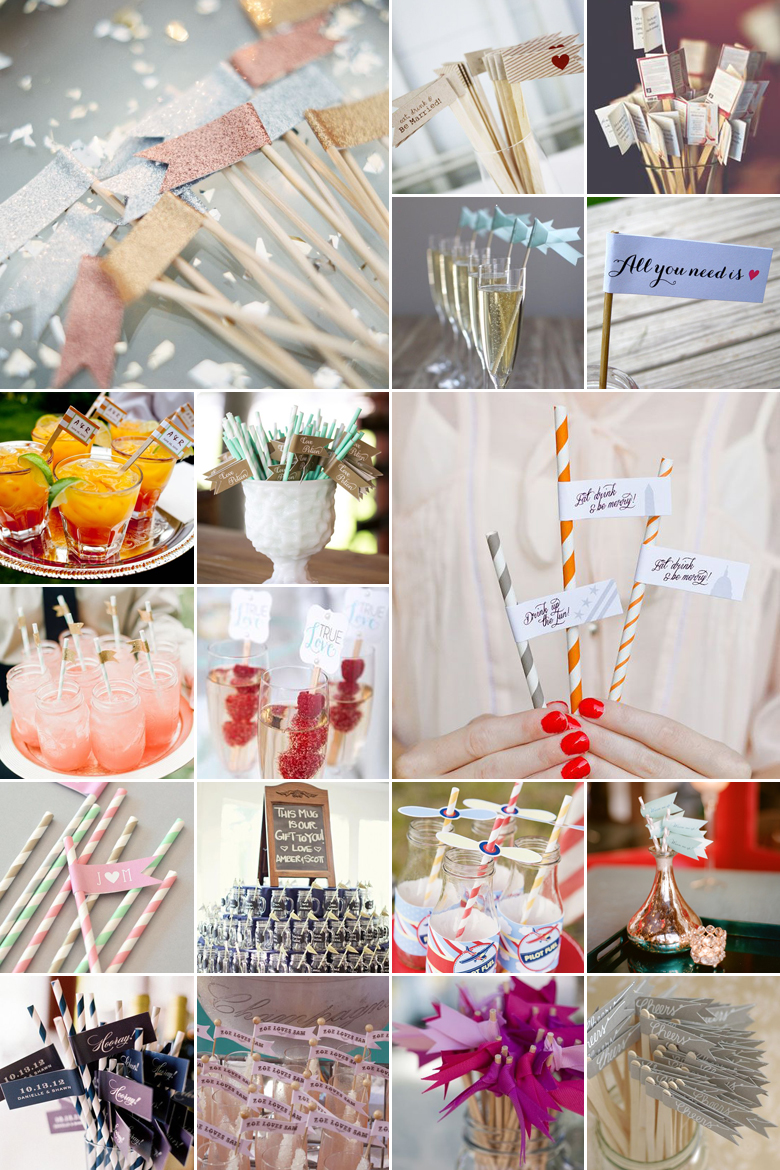
Drinks flags are a fantastic way to personalise even the most generically branded beverage. Whether it be a bottled cider, a cocktail or a welcome drink, a mini flag turns every drink into part of the wedding décor so to speak, and they cost next to nothing!
Now, when you decide to tackle this project, remember the following hints and tips:
- Opt for thin manageable paper – In DIY cases like this one, thick paper will only make the task that much more difficult – from the cutting right through to the folding. What’s more, because thicker paper doesn’t curve as easily as thinner sheets, it ends up slipping down the straw – not ideal!
- Do a couple of trial prints – You’ve bought your fancy paper and the last thing you want to do is mess it up with bad alignment or misprints! A simple black and white run on the printer at the library will show you exactly how everything fits on the page and could potentially save you from having to buy extra sheets of expensive paper.
- Take it one step at a time – Instead of starting and finishing one flag at a time, opt for an assembly line method whereby you cut all the flags first, then fold, then tape, and so forth. This will save you time and you won’t run the risk that the last flags end up looking better than the first.
- Use a proper paper cutting blade – Scissors might seem like the obvious choice, but the result is nowhere near as professional as what you would get when using a blade. Available at most stationery stores, cutting blades are super easy to use once you get the hang of it!
- Invest in a roll of double sided tape – It’s a little bit more expensive than glue, but tape will make life so much easier! While there’s nothing wrong with glue, double sided tape tends to be a lot less messy and you won’t risk getting glue stains all over your pretty paper.
Original images and their credits available on Pinterest