Shutter Shenanigans { Rustic DIY }
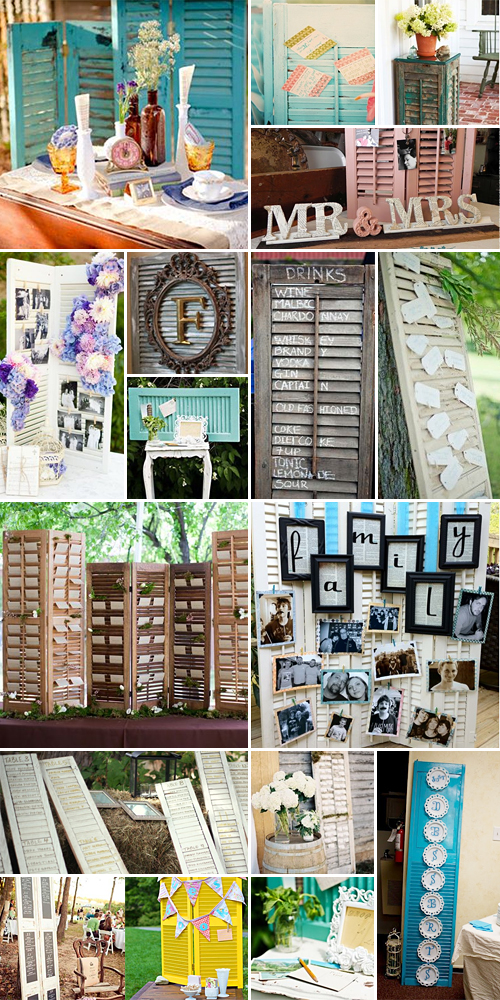
You’ve seen them attached to your grandmother’s old farmhouse and you’ve climbed over them to get to the vintage treasures at the local thrift shop. But while it might not look like much, a prepped and prettified shutter sure has the ability to impress – whether standing on its own or lined up by the dozen.
How you go about fixing ‘em up is really up to you. We’ve seen brides whitewash their shutters, slather it in black board paint, douse it in girly pastels and even cover it in fabric. We also love the look of paint peeling off the aged wood, yet there are few things as charming as a stripped shutter with the raw wood completely exposed.
Once you’ve prepped your shutter to your heart’s content, you can incorporate it into your wedding using one or more of the following ideas:
- Turn two or more shutters into your table plan, sliding the place cards into the little slots.
- Paint the shutters with black board paint and write the menu or table plan on it.
- Make your very own focal flower wall by poking the flower stems through the shutter slots.
- Use shutters as the backdrop for your photo session or in the photo booth. Alternatively, turn the shutters into a room divider which can be used to cordon off certain areas of the venue.
- Make a photo timeline of you and hubby-to-be by simply slotting the pictures into the grooves of the shutter.
- Build a shutter shelf using two old wooden step ladders as the support beams and the shutters as the shelves – the perfect flower display table or dessert counter!
Original images and their credits available on Pinterest