DIY Terrariums { Lush + Lovely }
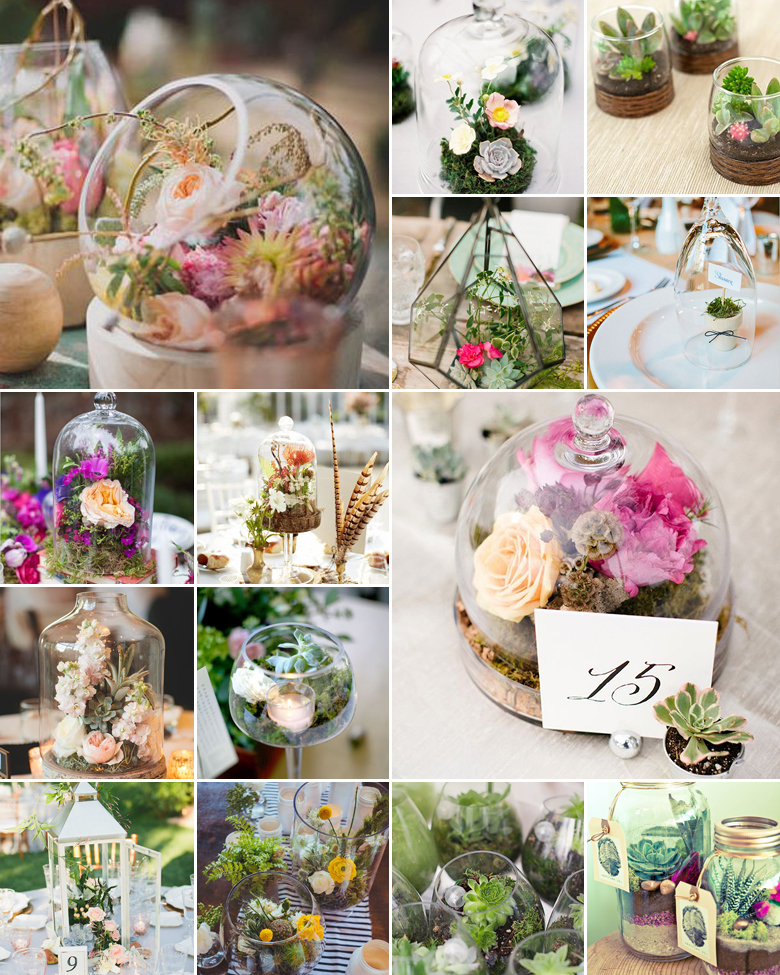
Terrariums are ideal either as centerpieces or as guest favours. Here’s a handy step-by-step so you can make your own:
You'll need:
- An old dessert spoon or mini hand-shovel
- Gloves
- A clear glass jar or interesting vase
- Rocks, gravel or pebbles
- Activated charcoal
- Potting soil
- Various small plants that require similar amounts of care, food and water
- Planter stick with guest’s name tag at the top
- Decorative glass pebbles or river stones
Now to get started:
- Prepare the glass container. Wash both the interior and exterior thoroughly to ensure that the glass sparkles and the container is free of chemicals that might affect your plants.
- Fill the base of the container with your rocks or pebbles – this will help with drainage so your plants don’t drown.
- Sprinkle the activated charcoal on top of the rocks or pebbles – just enough so that the rocks are covered. This will help improve plant growth and reduce bacteria, fungi and odours.
- Use the spoon or spade to add a layer of potting soil – make sure the potting soil is appropriate for the plants you’ve chosen. Add enough soil so the plant roots will have plenty of room to fit and then grow – preferable slightly deeper than the plant’s current pot.
- Use the spoon to dig little holes in the soil and gently plant your little greenlings. Sprinkle more soil around the top and make sure the soil is compact around the base of the plant. Don’t plant too close to the sides of the container.
- Finally, smooth out the soil and add a layer of your chosen river stones or glass pebbles, as well as planting your planter stick (with the guest’s name tag).
Original images and their credits available on Pinterest