Wishing Tree { DIY Prettiness }
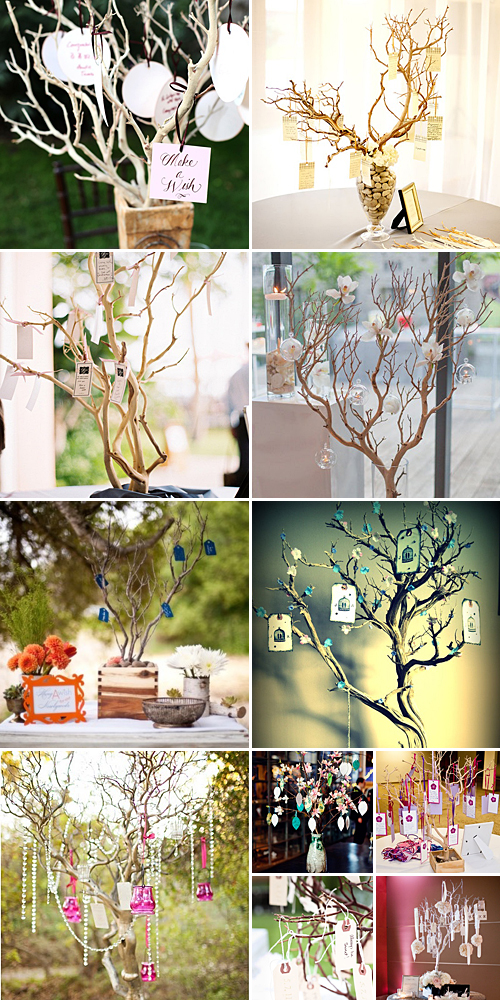
We’re all about chucking the rule book out the window, and today the traditional guest book is going out with it. Your wedding day is all about magic and enchantment, so why not complete the look and feel with a whimsical wishing tree? Not only is it pretty to look at, it’s fun and easy to make! Here’s how…
What you need:
- 6 to 10 dry branches with plenty of twigs attached
- Spray paint or spray-on varnish (optional)
- Glass vase or planter pot
- “Foundation” in which to plant the branches – e.g. river stones, glass pebbles, potting soil.
- Decorations like beads or crystals (optional)
- Cardboard paper
- Thin ribbon
Now to get you started:
- Strip the branches of any leaves that might still be hanging on for dear life.
- Optional: Coat the branches with spray paint or varnish. Be careful of applying it in thick coats – rather apply multiple layers of paint until you’ve achieved the desired look.
- Fill the vase or planter pot with your “foundation” and plant the branches in the pot, making sure that it’s secure.
- Optional: Decorate your tree with strings of beads, small crystals, glitter, ribbon or whatever your heart desires.
- For the wishing cards (on which guests will write), cut the cardboard into the desired shape – just don’t make the cards too big! Punch a hole through the top, thread a piece of ribbon through the card and tie the two ends together to form a loop.
All that’s left to say is, TA-DA!
Original images and their credits available on Pinterest.

![Future Mrs [Your Name] T-Shirt](https://www.celebration.co.za/shop/wp-content/uploads/2019/03/future-mrs-your-name.jpg)